

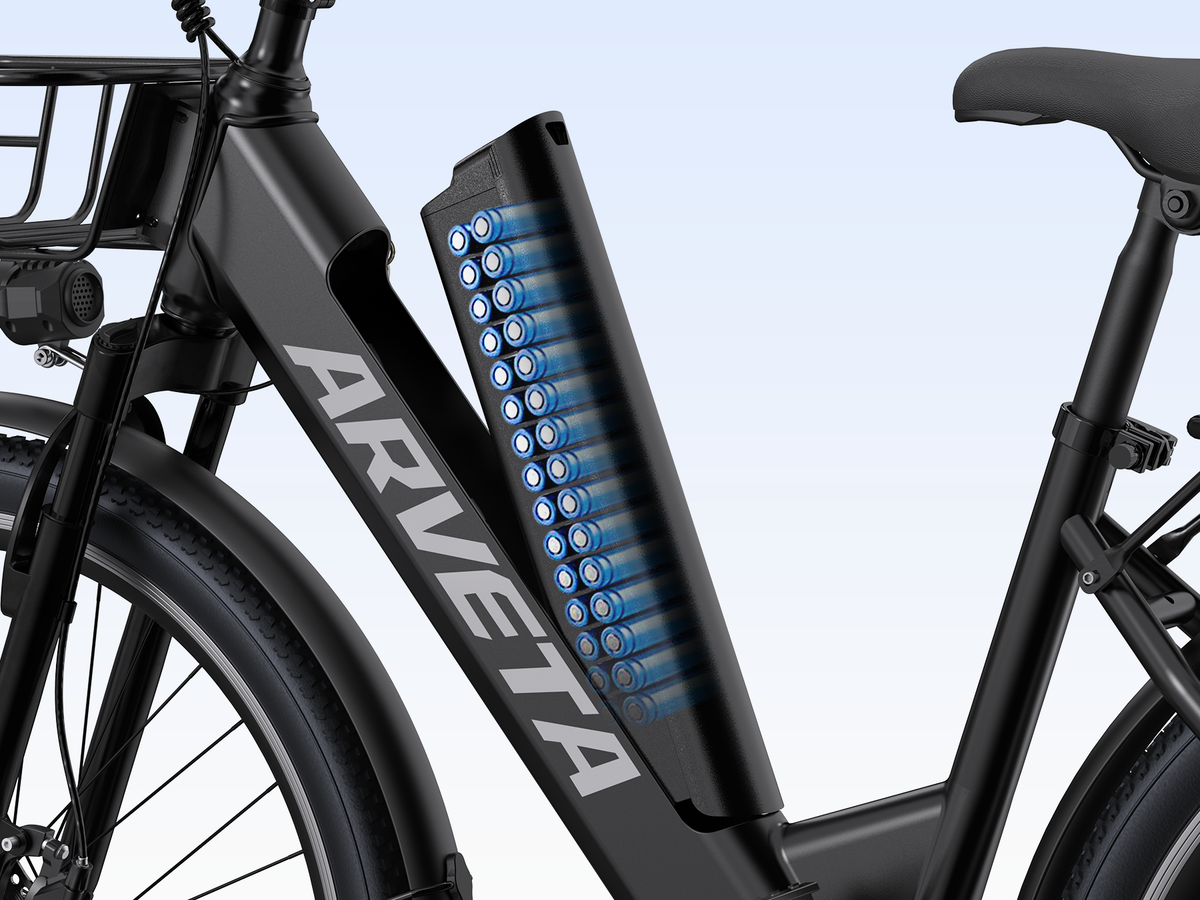
Install a new e-bike battery by confirming the correct complete replacement pack, turning off the bike, disconnecting the charger, and removing the old pack using your model’s release procedure. Inspect the mount, fit and lock the replacement as instructed, then check that it is secure before powering up. Finish with a short, controlled test ride.
The physical swap may be straightforward, but choosing the right battery comes first. A similar case, matching voltage, or familiar connector does not establish compatibility. At Movcan, we want riders to confirm the battery, mount, and charger together before installation. This guide covers replacing a complete, sealed battery pack. It does not involve opening the housing, replacing cells, or modifying the bike’s wiring.
Confirm which battery your Movcan needs
Match the model and the original pack
Find your bike’s exact model name, serial number, and order information. Photograph the original battery’s label and its accessible mounting features. If you bought the bike used, note any changes you know about rather than assuming the battery currently fitted is the original specification.
Start with our e-bike batteries and chargers collection, then open the individual product listing. Check its model options and compare them with your bike. Battery capacity, electrical connections, mounting shape, retention hardware, and charger requirements all need to match the approved configuration.
For example, our V80 e-bike battery is listed as a 48V 13Ah pack with a V80 model option. That identifies a specific replacement product; it does not mean every 48V battery will fit a V80. Likewise, the V30 and V60 series battery page includes separate model selections. Choose the correct option instead of treating the collection name as permission to interchange packs.
Confirm the charger before ordering
Check whether your existing Movcan charger is approved for the replacement battery. Read both labels and the applicable instructions. A plug that fits is not enough: the charger must match the battery’s charging requirements. Do not substitute an unconfirmed charger or choose a higher-voltage pack to increase performance.
If your bike uses more than one battery, identify which pack and mounting position need replacement. Do not assume the packs are interchangeable or add a second pack, splitter, or battery manager as part of this job. Replacing the original approved configuration and installing an upgrade are different tasks.
Prepare the bike and workspace
Work on a level surface with good lighting and room to support the bike. Remove cargo that blocks battery access. Have the correct key, a clean dry cloth, and a stable place to set the removed pack ready before starting. Keep loose metal objects away from the battery terminals.
Turn the bike off and disconnect all charging equipment. If your battery has a separate power control, follow its instructions as well. Keep hands away from the throttle and assist controls while handling the pack. Do not rely on a dark display as proof that exposed battery terminals cannot deliver power.
Check the old and new batteries externally. Stop if either pack has swelling, cracks, leaking fluid, burned areas, or damaged contacts. A battery that has been submerged, seriously dropped, or involved in a crash needs assessment even when the exterior damage looks minor. Do not charge a questionable pack to see whether it still works.
Remove the old battery without forcing the release
Read the relevant instructions on our User Manual page. The manual must match the bike and battery interface in front of you. If a key position, latch, or illustration differs, stop and get clarification before releasing the pack.
Support the battery’s weight before operating its lock or retention mechanism. Use the release sequence specified for your model, then move the pack in the indicated direction. Depending on the design, a battery may slide, lift, or pivot out. A second catch may also need attention. Do not invent a direction from another model’s video.
Keep control of the pack throughout removal. Never pull it by the key, pry against the frame, or use a hammer to free a stuck housing. Resistance can indicate a partially engaged latch, a damaged mount, or misalignment. If the battery will not release normally, leave the assembly intact and arrange help.
Set an undamaged removed pack on a stable, dry surface away from tools and traffic. If it shows signs of damage or abnormal heating, stop handling it and seek appropriate assistance. Smoke, hissing, or rapidly increasing heat is an emergency: move away and contact emergency services.
Inspect the mount and connection area
With the bike still off, look for debris, moisture, cracked supports, bent contacts, or loose mounting hardware. Check accessible exterior surfaces without touching the battery contacts or putting tools into the interface. Keep keys and jewelry clear of terminals to prevent accidental short circuits.
Wipe ordinary dirt from the surrounding exterior with a dry cloth. Do not scrape contacts, bend pins, or spray cleaner or lubricant into the connection. Green deposits, scorching, melted plastic, or a damaged latch are reasons to stop. A fresh battery cannot compensate for a faulty mount.
Make sure the battery and mounting area are dry before installation. If there is reason to suspect moisture inside the system, exterior drying alone is insufficient. Do not reconnect power until the affected components have been assessed.
Fit and lock the replacement pack
Compare the new pack with the approved replacement information before bringing it to the mount. Confirm the label and mounting interface, and inspect the housing for shipping damage. Keep the charger disconnected while fitting the battery.
Align the pack with the mounting features shown in the instructions and guide it into position. Apply only the controlled pressure needed to engage the approved mechanism. Stop if the housing catches, the connection does not align, or installation requires forcing the pack into place.
What the V80 manual confirms
The V80 manual’s battery installation section describes positioning the battery, seating it until the retention mechanism engages, and turning the key to the locked position before removing the key. For a V80 that matches that manual, complete each retention step and check the pack’s security. Follow the key markings and instructions supplied for your version if they differ; do not transfer that sequence to another Movcan model.
An audible click is useful feedback, but it is not the entire security check. With the battery supported, gently verify that it cannot come free in its normal removal direction. Check for unexpected gaps, abnormal movement, or a lock that will not engage. Do not ride until the pack is properly retained.
Charge correctly and perform a short test
Use the approved charger and follow the replacement pack’s charging instructions. Do not assume a new battery needs an extended conditioning charge or a complete discharge before use. Confirm unclear first-charge directions with support rather than choosing a charging duration from an unrelated tutorial.
Charge in a dry, ventilated location permitted by the equipment instructions and building rules. Keep the equipment uncovered, away from combustible materials, and clear of exits. Stay present and disconnect it when charging is complete. Do not charge while sleeping, and let a battery arriving from temperature extremes reach its permitted charging conditions naturally.
Before turning on the bike, disconnect the charger and close the charging-port cover. Check normal display operation and any fault message. Then take a brief ride in a clear area at a low assist setting. Check predictable assistance and braking, stop, and inspect battery retention again.
If power cuts out, an error appears, or the battery moves, end the test. Contact Movcan customer support with the bike model, battery and charger photos, and the exact symptom. Repeatedly forcing the pack in and out is not a useful diagnostic step.
Avoid mistakes that can damage a replacement battery
Do not interpret reduced range alone as proof that a battery needs replacement. Tire pressure, temperature, wind, load, terrain, and assist use all affect distance per charge. Intermittent power can also come from a connection or another electrical fault. Describe the problem before buying parts if you are unsure of the cause.
Do not put the removed pack in household trash or curbside recycling. Ask a local battery collection program whether it accepts e-bike packs, disclose any damage, and follow its handling instructions. Keep an undamaged pack protected from impact and accidental terminal contact while arranging collection. Never ship a damaged battery without instructions from an appropriate specialist.
Frequently Asked Questions
Can I replace my e-bike battery myself?
You may be able to replace an approved removable pack if the instructions match your bike and you can support it safely. A stuck release, damaged mount, unclear fit, or electrical fault calls for qualified assistance.
Will any 48V battery work with my Movcan?
No. Voltage is only one requirement. The complete battery must match the approved mechanical and electrical configuration, including its mount, connection, and charger. Confirm the exact replacement for your model before ordering.
What if the new battery fits but the bike will not turn on?
Turn the bike off and check the confirmed installation instructions, battery charge, and lock engagement. If those exterior checks do not resolve the problem, contact support. Do not open the pack or change wiring to troubleshoot it.
Do I need to replace the charger with the battery?
Not necessarily. Your existing charger may be suitable when it is explicitly approved for the replacement pack. Confirm that match first; neither a fitting plug nor a similar voltage description proves compatibility.